Plugins
Introduction
Nxt Plugins is a feature that enables third-party software developers to add functionality to the Nxt Client Interface.
This guide describes how to install and use a plugin. Because plugins have unrestricted access to the local Nxt Server including sensitive data and functionality, it is vitally important to install only trusted plugins. If there is any doubt, install a plugin only on the Testnet or on Mainnet accounts with small balances.
This guide describes Nxt Plugins as of Nxt software release 1.5.9.
Acquire a Plugin
Plugins are authored by third party developers. Some are free while others can be purchased in the Nxt Marketplace under the tag plugin. A good place to discover plugins and ask questions about them is the Nxt Plugins subforum.
- Unless you are an expert coder who is able to independently verify that a plugin is safe to use, only acquire plugins that have been signed by trusted members of the Nxt community.
Install a Plugin
When the Nxt Client Interface is launched, it automatically scans the directory nxt/html/ui/plugins for plugins. A plugin is a collection of files in a certain format, all contained within a subdirectory. For example, the Hello World plugin is already installed in the official Nxt Client as the subdirectory nxt/html/ui/plugins/hello_world.
Installation of a new plugin consists of downloading a zip file from a trusted source, validating the zip file, then extracting the zip file into the nxt/html/ui/plugins directory.
Following is an example reinstallation of the Hello World plugin using a terminal window on a Linux system. Details of the procedure may vary on other systems.
Download a Plugin
Navigate to the plugins directory:
$ cd nxt/html/ui/plugins
Download the plugin zip file:
$ curl -OL https://bitbucket.org/mystcoin/hello_world/downloads/hello_world.zip
Validate the Downloaded Plugin File
Validating a plugin ensures that the downloaded zip file has not been modified since being zipped by a trusted Nxt account owner. Validation is a two step process requiring a checksum and a checksum signature.
Acquire the Checksum
In this example the sha256 checksum (also termed hash code or message digest) is:
ed8b1c197feadea428aaa4625e356eb84f3b2ae7f6ddc1320a9a76d742392313
- A checksum always should be provided by the author of the plugin. It uniquely identifies a particular version of the plugin and can validate that your downloaded copy of the plugin is identical to the official version.
Acquire the Checksum Signature
To ensure that the checksum itself is valid, it should be digitally signed. Nxt tokens provide a convenient digital signature mechanism.
In this example a Nxt token for the checksum was generated by mystcoin (the author of this guide):
89urfe4danhu1g49c07l522l3pavesdk87kul769mcvsnfjjqob222u8ci7bsvg2b0udq54enfliv8r3isfu4tdabpijqgpn7foenhmf8sogji1g21bqansbd7pge8hl5bgr1m8qvh9rt6l1ihoutqn40e03fl0l
- Tokens should be provided by the author of the plugin and may additionally be provided by users of the plugin who are satisfied that it is safe to use. Several signatures generated by trusted code experts are better than one.
- The signature may apply to a text message that includes the checksum along with other data. It only matters that the checksum is present somewhere in the message.
Validate the Checksum
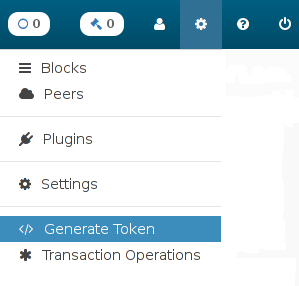
The checksum can be validated using the Nxt Client as follows. First open the Nxt Token Generation / Validation pop-up entry form by clicking on the gear graphic in the upper right corner, then clicking on Generate Token:
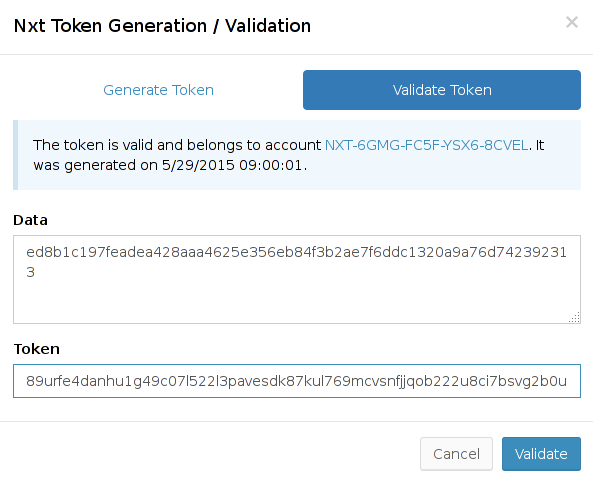
Next, click on the Validate Token tab of the entry form and enter the checksum, or whatever text containing the checksum was signed, into the Data field and the token into the Token field. Finally, click on Validate:
- The result of the validation check is displayed, indicating whether the checksum is properly signed and if so, which account signed it and when. A valid token implies that someone who knows the signing account's secret passphrase must have signed the checksum and that the checksum has not been altered since it was signed.
- In this example the signing account is NXT-6GMG-FC5F-YSX6-8CVEL, owned by mystcoin (the author of this guide).
Validate the File
Returning to the terminal window, still in the nxt/html/ui/plugins directory where hello_world.zip resides, pipe the checksum and downloaded filename to the sha256sum utility as follows:
$ echo "ed8b1c197feadea428aaa4625e356eb84f3b2ae7f6ddc1320a9a76d742392313 hello_world.zip" | sha256sum -c
The utility should give the result:
hello_world.zip: OK
- This validates that the downloaded zip file is the same one that mystcoin zipped.
Extract the Downloaded Plugin File
Now that the downloaded zip file has been validated, it can be extracted into the nxt/html/ui/plugins directory. In this example, however, the plugin is already present since it is packaged with the Nxt software. For the sake of this example, rename the existing hello_world directory:
$ mv hello_world hw
Now, extract the downloaded zip file:
$ unzip hello_world.zip
To verify that the newly created hello_world directory is the same as the preexisting one:
$ diff -r hello_world hw
If there are no differences, the diff command produces no output; otherwise, it displays differences between the two directories. If the official plugin is someday upgraded, there will be differences and there is no need to trust the version just downloaded. Simply restore the preexisting version:
$ mv hw hello_world
But if you trust the new downloaded version, you may remove the preexisting version instead:
$ rm -r hw
- When updating an existing plugin, it is advisable to remove it before installing the new version.
Activate the Plugin
The Hello World plugin is initially deactivated. To activate it, edit the manifest.json file in the directory nxt/html/ui/plugins/hello_world and set the deactivated parameter to false. Then, gzip the manifest.json file with gzip -k manifest.json. The gzipped file manifest.json.gz is optional but takes precedence if present; so you may optionally delete the old manifest.json.gz rather than update it by gzipping manifest.json.
- After installing a new plugin, log out from the Nxt Client if you are logged in. The Nxt Client will load all active plugins when you next log in, if plugins are enabled.
Use a Plugin
Enable Plugins
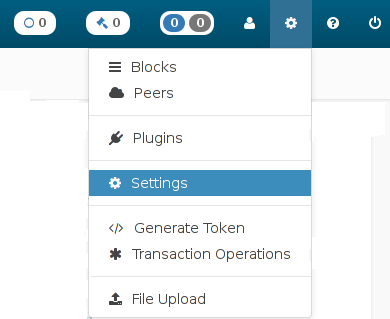
The Nxt Client Plugin System is controlled from the Settings screen. To enable plugins click on the gear graphic in the upper right corner of the Nxt Client, then click on Settings.
- On the Settings screen, select Yes from the Enable Plugins drop-down list to enable plugins.
- Changes to this control do not take effect until the next login, so log out.
Security Features
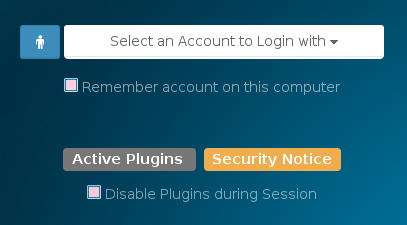
Plugins are loaded by the Nxt Client during login. Because plugins are potentially dangerous, the Nxt Client login screen has several plugin security features explained below. These features will not appear when there are no active plugins.
Security Notice
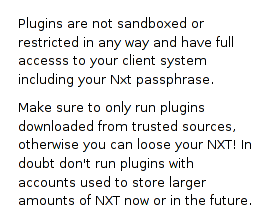
Hovering the cursor above the gold Security Notice box causes this warning to appear:
List of Active Plugins
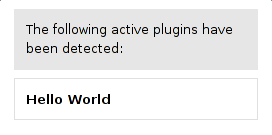
Hovering the cursor above the gray Active Plugins box causes a list of all active plugins to appear:
Disable Plugins during Session
Check this box before logging in if you are using a client that anyone else has had access to, or if there is any doubt about the active plugins. This control overrides the Enable Plugins setting for the current login session.
Check a Plugin's Status
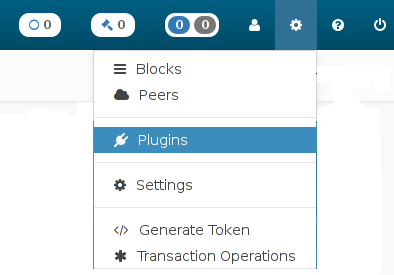
Click on the gear graphic in the upper right corner of the Nxt Client, then click on Plugins:
A Plugins screen appears listing each installed plugin and its status:
- During the login process, the nxt/html/ui/plugins directory is scanned for plugin subdirectories. Each plugin found is checked for validity, compatibility and launch status.
- A plugin is Valid if it conforms to the standard file structure and content requirements for all plugins.
- A plugin is compatible with the Nxt Client if its NRS Compatibility has the same major version number. Compatibility is indicated by a green background.
- The Nxt Client version is displayed in the upper right corner of the Nxt Client Dashboard. The major version is the first two numbers. For example, version 1.5.6e is major version 1.5.
- If the Nxt Client major version is smaller, the plugin is disabled and the Launch Status is Halted with a red background. The Nxt client should be updated.
- If the Nxt Client major version is larger, the plugin is enabled but the Launch Status is Running with a gold background, indicating that the plugin should be updated.
Remove or Deactivate a Plugin
A plugin can be removed by removing its subdirectory in the nxt/html/ui/plugins directory, then logging out of the Nxt Client.
A plugin can be deactivated without removing it by editing the manifest.json file in the plugin subdirectory. Simply change the JSON deactivated field from false to true. Then, update the manifest.json.gz file with gzip -k manifest.json. Finally, log out of the Nxt Client.
- A deactivated plugin appears on the Plugins Status screen with a Launch Status of Deactivated on a gold background.
Plugin Interface
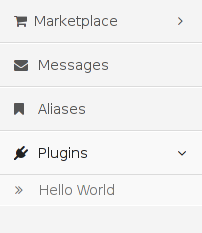
For detailed instructions on the use of a plugin, refer to documentation provided by the author of the plugin. Typically, unless the author provides another means of access, the plugin is accessed through the Plugins menu item in the left-hand pane of the Nxt Client:
- Click on Hello World to open the example plugin, which displays the status of the Nxt blockchain.

