Use the Phasing Feature to Emulate Multisig Accounts in the NXT Platform
NOTE: this guide supplements the video tutorial, produced by Roberto Capodieci, that can be found at: https://www.youtube.com/watch?v=z0J1uuJL_5I
Introduction
Nxt offers Account Control: an account can be controlled by other accounts, making any transaction go through an approval process by the controlling accounts. Beside many other possibilities, this allows to emulate the concept of MultiSignature well known in Bitcoin and other blockchains.
Account Control for phased transactions.
Any Nxt Blockchain account can be restricted to sending only phased transactions, subject to a specific voting model. This is achieved by the account submitting a setPhasingOnly transaction using the setPhasingOnlyControl API. The getPhasingOnlyControl API can be used to retrieve the status of an account phasing control, and getAllPhasingOnlyControls can be used to get all the accounts subject to phasing control along with their respective restrictions. Once set, the phasing only account control can only be disabled or changed with another setPhasingOnly transaction, itself subject to the currently set phasing restrictions. Note that by-transaction and by-hash voting models are not allowed for phasing control. Setting the voting model to none is used to disable the control. To prevent deadlocks due to cyclic account control restrictions, approval transactions themselves (PhasingVoteCasting) are not subject to phasing only account control. When setting phasing account control, a maximum fees total can be specified, limiting the total fees for currently pending phased transactions of the controlled account, and limits can be placed on the minimum and maximum phasing durations allowed. Transactions of accounts subject to phasing account control with restriction on maximum fees are throttled at one transaction per account per block.
While this is not technically a multisignature as per cryptographic definition, the way Nxt handles Account Control offers the full pool of users in the blockchain many more opportunities to decide how a transaction is authorised and by whom. This tutorial has been limited to the emulation of a MultiSig account in the Nxt Blockchain, and had no intention to go into other details. For more info check the Nxt Wiki: https://nxtwiki.org/wiki/Phasing Watch the tutorial video here: https://www.youtube.com/watch?v=z0J1uuJL_5I
Step by step guide
Note also that all the operations illustrated below can be executed also via API.
Setting up the controlled account
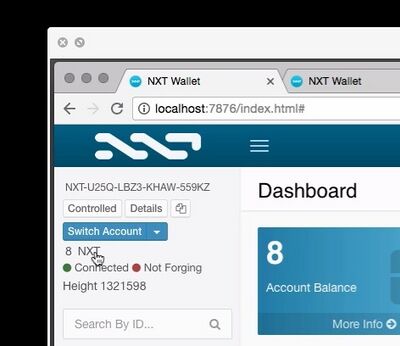
Open the wallet UI, and log in with the account you want to be controlled (the account from where the funds will leave when a MultiSignature approves it). Make sure the account has a few coins of balance as setting up the account control requires a fee,
Step 1
Open a special dialog window and choose the Account Control tab Click on the account balance to open the dialog to set the Account Control
Step 2
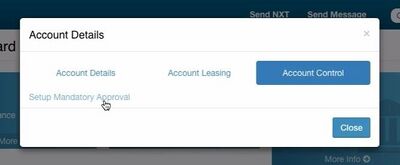
Open the Account Control Mandatory Approval Setup
In this dialog go to the third tab “Account Control” and click on it. If the account has no Account Control set up already, you should see the link “Setup Mandatory Approval”. Click on it to open the setting dialog to set up Account Control.
Step 3
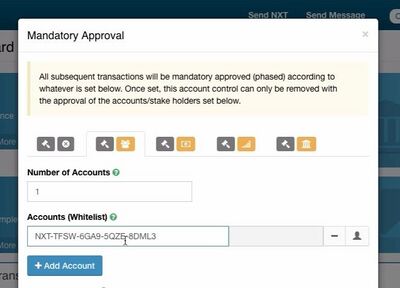
Choose the second control option out of the 5 available
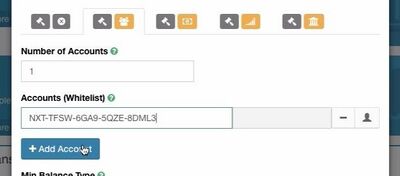
In this tab you can start adding the list of the accounts that are authorised to sign for a transaction to be approved.
Step 4
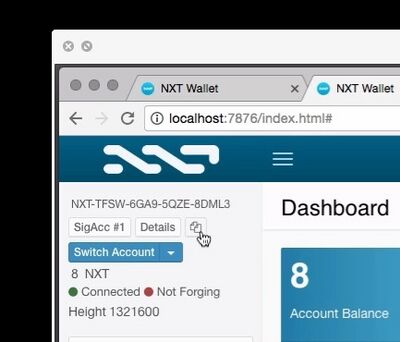
Copy all the account IDs and paste them into the list
To copy an account ID simply click on the copy icon in the account, and paste the account ID in an email or wherever necessary to make it available to the person setting up the Account control.
Step 5
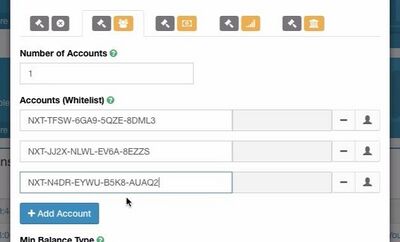
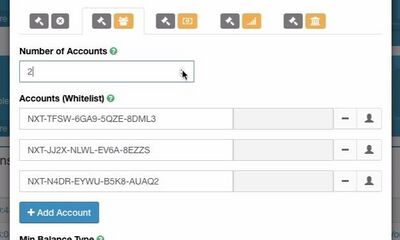
Set the account list and quorum for transactions approval
List as many account IDs as you need and chose how many approvals are necessary to authorise a transaction. For example, if you have 10 authorised accounts to sign, you can chose that only 6 are necessary to approve the transaction
Click on “+ Add Account” to list more accounts,
and set the number of minimum account approvals to approve the transaction in “number of accounts”
Step 6
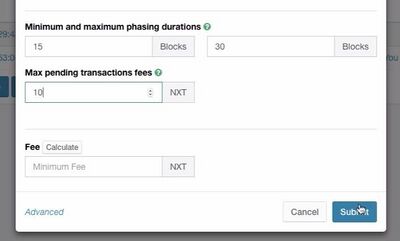
Choose when the transaction will be executed
In the “Minimum and maximum phasing duration” fields you can set, in blocks (1 block equals 1 minute circa) the starting and ending time of the window when the transaction will be executed. For example, following the image above, the transactions set by the controlled accounts will be executed (if the necessary amount of approvals is reached) between 15 to 30 minutes after the submission. This means that if all the necessary approvals (co-signatures) are achieved in 5 minutes after the transaction has been submitted, the transaction will be executed anyways after 15 minutes. If past 15 minutes not enough approvals have been submitted, the transaction keep waiting until 30 minutes from its submission to execute. If within this window of time the quorum of approval is reached, then the transaction will be executed immediately, else it will fail and not be executed. The “Max pending transactions fees” is the maximum amount of fees, per block, that the controlled account can spend (for example to issue new transactions that will need to be approved). It is important to leave at least 2, as controlled accounts transactions cost 2 in fees, but not a too high amount either, as someone with the secret phrase of that account could abuse it spending all the funds in fees.
Step 7
Submit the form
In the main control panel check that the controlled Account settings are submitted and registered in the blockchain (this is, there is at least 1 or more confirmations)
Sending a transaction from the controlled account
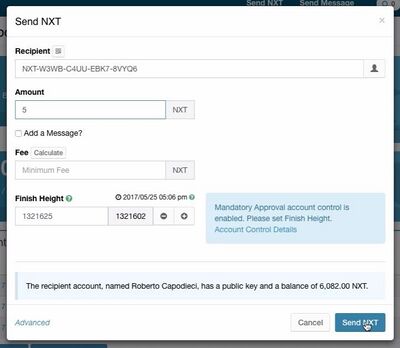
When sending a transaction from the controlled account, a warning appears.
Send the transaction as usual
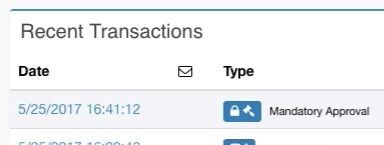
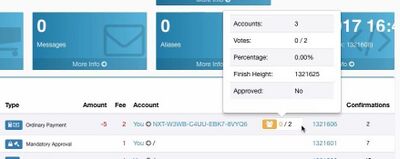
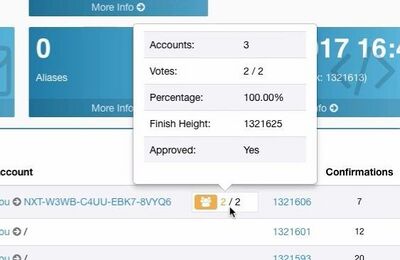
Once sent, the transaction appears in the main dashboard, showing how many approvals have already been received. Mouse over the icon to get details on the finish height and status of the transaction
Approving a Transaction (cosigning the MultiSig)
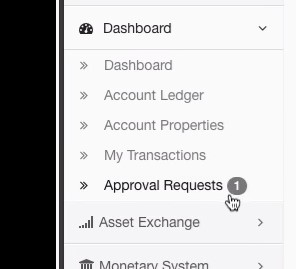
Once that the controlled account sends a transaction, the controller accounts (the accounts to co-sign the MultiSig transaction) will receive an “Approval Request” notice.
Step 1:
Clicking on the approval request notification will open a page with all the transactions that need approval. The cosigning account holder can verify that all is ok, and press on the “approve” button on the right.
Step 2: confirming the approval
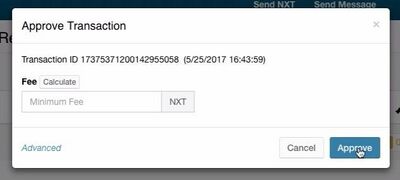
A dialog will open requesting to approve the transaction and offering additional options.
Verifying that the transaction went through
Both sender (controlled account) and recipient can see the status of the approval.
Addendum
Two more items that deserve attention: changing account control and using the API to manage Account Control.
Freeing an account from being “controlled”
This seems quite obvious, but better make it clear: in order to remove or edit the way an account is controlled, the approval of the controlling accounts is necessary.
All you saw above, but via API
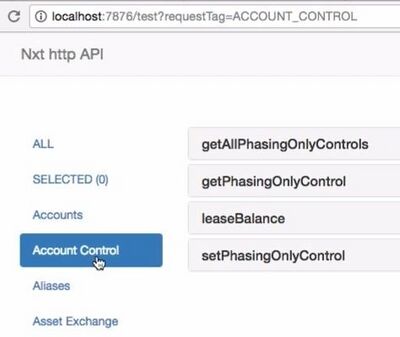
The API requests to set and manage Account Control are available at the /test URL of the node address being used. From LocalHost, for example, to check the status of the account control of an account, simply use: http://localhost:7876/nxt?requestType=getPhasingOnlyControl&account=[ACCOUNTID]

